So I made this yesterday, took about an hour total. Spent under 12 bucks. used one 8ft rough cut 2x6 from the local lumber yard (actually had it laying around didnt make a separate trip) not sure on exact price but they are under 2 bucks and a 2'x4' sheet of 3/8'' plywood (homedepot) for 10 bucks.
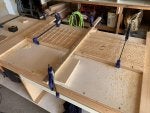
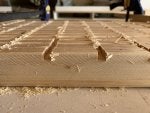
So my dry box is 40x16x16'' so I cut my 2x6 into two 39 7/8'' lengths, clamped them to my picnic table flush with one another, marked straight lines every 3 inches with a T-square, and took a scrap piece of wood with a straight edge and lined it up with the first line, screwed it to the two boards with two short screws and routered away (3/8'' straight bit, about 1/2'' deep)! I first tried clamping my guide piece but it moved around and was hard to clamp with the table being in the way, I dont mind the few screw holes so screwing it down made it super solid and easy to run the edge of my router down to ensure my cuts were all straight and lined up on the two individual boards.
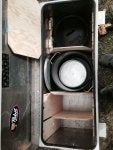
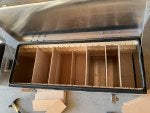
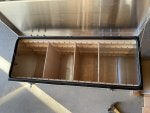
After those were cut, I placed them in my box, they fit snuggly, not so tight I had to hammer them in, but snug enough, then I measured and cut two end pieces to help keep the boards in place, probably overkill and unneeded but I had the wood so I figured why not.
Lastly I cut the ply wood to size to squeeze snuggly into the routered slots, I made two 14'' tall and 2 10'' tall so I can lay longer stuff over the top of the shorter dividers. I also had to cut the top corners off the dividers so I could get them in my drybox since the opening on top of my box is not as wide as the outter edge. Leaves a little gap inside, but its another place to place longer items i guess and they will keep most things much more organized than before. Lastly I sanded the edges so they dont attack with splinters to anyone rooting around int he box. 4 dividers may also be over kill but we'll see as I start to repack it.
Anyway, super simple if you have a table saw and a router, 12 bucks and an hour or two. Considering painting them with marine paint just so they are waterproof in case water somehow gets in my dry box, but for now they are staying as they are.
Here are some pics, start to finish:


")